Modeling Monday 2
Simple editing using DAZ studio only.
Build a simple set.
Lets create a plane at 10 m
In the screen pane let's name it floor.
Change to color in surfaces. I'm tempted to make it a light gray like millions of school floors, but that won't show shadows and we need the shadows to make our images look better. So, how about a medium gray green. 96 96 72. Also add in our 2EZ lights (if you don't remember check labels for a blog entry to explain)

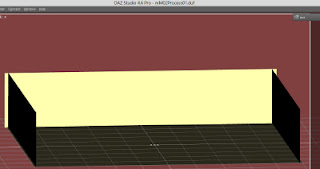
Create another plane 4 m and name it backWall
Rotate x 90 and x scale it until its slightly longer than the 10 m floor
Then Y translate until its just below the floor and move it back ( Z translate) until its just before the end of the floor.
We want to avoid the temptation to make it match or align it exactly. In a 3D editor we could weld the pieces together and they would make exactly. We don't have that here. Remember we only have one pixel to see the match in and that's only one in a few hundred. It will look fine at this resolution, but when we take our great scene into a higher resolution there may be tiny cracks we can't even see, but the lights will find each and every one. Now, we can be sealed up at any resolution by just having little overlap.
make a left an right wall the same way we made the back. For side walls we have to Y rotate 90 as well as X rotate 90.
Select the 3 walls in the scene tab and change their color in the surfaces tab. I used a light tan. I used 220 192 128.
You can see from the shadows that we need to move our distant light to aim into the room. This room is like a theatre or movie set (no ceiling, no fourth wall) so that we can light it and so that cameras can see into it.
The lights can be like a camera in the view select tab.
You can see that I named my distant light "sun"
Now let's add some dance studio details. Create a new plane but make it 10 cm X rotate 90 and X scale to our room width. Then move it back onto the back wall where it touches the floor. Make it a dark brown 128 64 0.
Create a cylinder 5 cm diameter and 10.2 m height and make it dark brown 128 64 0. Name it rail.
It will be vertical in the middle of the floor. Z rotate 90 move it to the back wall just a few cm in front of the wall and about waist high. It should penetrate each side wall a little.
Since this is a dance studio its going to need a big mirror. Create a 3 m plane move onto the back wall behind the rail and just touching the back wall. Name it mirror.
Using X scale and Y scale stretch the mirror until it is slightly smaller than the back wall.
Here's how we make it a mirror. In the surfaces tab make its diffuse color black, yes, black 0 0 0.
Scroll down in the surfaces tab to find reflection. The color should be white 255 255 255 and the strength should be 100.0%
The mirror will not reflect unless you set render to do it. Render menu - Render Settings will open a windows click on the Advanced tab and scroll until you can set Max Ray Trace Depth. For mirrors to work this must be more than one. Since this increases render time don't go crazy -- 2 or 3 will do.
Create a new camera to match Perspective View and use it for our scene. Drop in a couple of dancers or other people and render. It is slower with a mirror isn't. So if you don't have mirrors or shiny metal in a scene you probably want to turn this down to 1. If you want reflections in eyes, etc. It will have to be at least 2 though.
Well that's just awful. Now you are remembering that you thought I was crazy when I said make the mirror black and now look at this. But that's not it. There is no fourth wall on this set so what is in this mirror? Our whole vast 3D world and what's in the part that will show in the mirror? Nothing, nada, No people, objects, lights, ... So the mirror is giving us an accurate reflection. To fix this we need a temporary or plug wall to put where the fourth wall would be.
Create a plane but make it big this time 11 m. I named mine plugWall. Be sure to switch to Perspective View or Top View to place this wall. Camera now has the shot we want so be careful to protect it. From Top View you should be able to see your camera and it should be in our dance studio on the opposite side of the center line from our dancers. Changing the camera focal length to 50 or less can help.
Well, now its even worse. The mirror and just about everything else is dark. What happened? The reason theatres and movie sets don't have a fourth wall is so you can see into the set and to light it. Because our camera is in the room we can see into the set, but our new wall has blocked the light. Also when you look at the preview you can see we are lighting the backs of the dancers and not the fronts that will show in the mirror. Let's look through our distant light and move it around to the other side.
Not so good. We can't get light into the room except from the top which won't look so good. We could boost the uberEnvironment light up real high, but that won't look best either. Objects in our 3D world have some properties you don't get in the real world. We can decide whether they have shadows or not.
Select both the backWall and mirror in our scene tab. Click on the on button under Cast
Shadows to turn them Off.
Now when we look through our distant light the backWall and mirror have disappeared. You can also see I forgot to turn off cast shadows for the rail. So let's take care of that, then switch back to camera 1 and render.
<< render 009 >>
The mirror is working right now, but as you can see there are still a lot of things to fix. We go a strange shadow or the left and we need a ceiling (10.2 m white and cast shadows off) The rail is too high. The purpose of the plugWall is to be movable or made invisible when you can. This is harder in a small room with a big mirror, not so hard otherwise. We made extra big so that we can easily move it back when the camera needs to be outside the room. Because it is extra big you can move it up/down, left/right, etc, even tilt it if needed.
Hang on to this scene. I will find ways to improve it in the future. Textures, doors and windows, bright ceiling. I stayed with our 2EZ lights, but its clear this scene would be better with more lights.


3_5.jpg)


0 comments: