Freebie Friday 09
Yughues aka Nobiax
When you are making a scene its great to have a lot of things like rocks, plants, etc. to populate the scene. Nobiax is an excellent modeler and genius texture maker that has donated a substantial library of items to our 3D community.
Check out his YouTube Channel
You can download items from cg share at :Downloads
That's the good news. Alas, there is a little complication. He works with more sophisticated tools and methods, so using it in DAZ 3D Studio is not a slam dunk. It is indeed worth the extra effort though, so let's look at a couple of items and see what we can do. Learning how to handle obj based models opens up another world of resources.
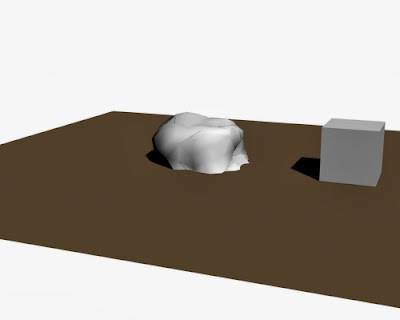
Make a scene with a 10m square plane and a distant light pointing at the plane. I like to include a 1m cube moved away from the origin, so I can tell right away what size the obj is.
Start with a rock
Don't try to put this into your DAZ library, but extract it into a separate place that you can easily find from Studio.
To get the rock into our scene we need to import the obj. There is also an FBX, but Studio is not able to import it.
So import the rock04 obj and use the defaults
Nice size, but way into the ground. Adjust Y translate until you like how the rock looks. You can see there are no textures applied. I am sure there must be some way to get the textures to come in with the import, but I haven't found it yet.
Select the rock and then open the surfaces tab. Apply the diffuse (he sometimes calls it diffus to diffuse color, the specular to specular strength and the normal to normal. Normal maps are a better way to do bump mapping and Studio now supports normal maps. If you have a normal, don't use a bump map.
I think this is a great looking rock and it wasn't a lot of trouble. He has quite a few rocks available.
Let's try a plant.
I am using bamboo from stylish plants.
Import it and apply textures like before, but this one only has diffuse.
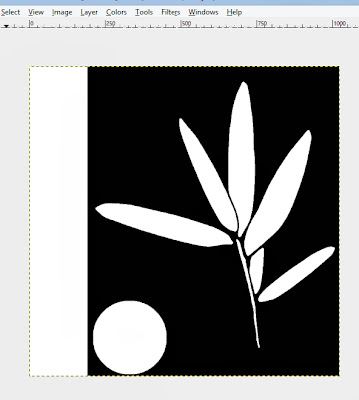
Ouch, this doesn't look as good as the rock. When you look at the Diffuse texture in GIMP you can see that Studio does not read the tga file the same way that GIMP does. The tga uses an alpha channel instead of an transparency map. So let's use GIMP to make a transparency map.
Change the Image Mode to 1 bit black and white.
Use the bucket fill to fill all of the image parts with white and the transparent part with black.
Convert the mode back to Image-Mode-RGB and export into the same location as the other textures as TRANS.jpg. Apply this to Opacity Strength
Now it looks right
Try this little trick.
Change the background color to white. Turn off the distant light and create a point light. Move the point light far way, so that it doesn't add any light to the scene. You should now have black bamboo against a white background.
Zoom in and move around until you have few leaves and stems in a composition that you like. This will render quickly.
So now you have made a Chinese bamboo painting with your 3D software. Although it can look nice, it will mostly prove how much better the Chinese paintings are. Apply the to a plane.
You will have a nice scene assets you can use as an art work, screen, or to cast a shadow on a window or wall.
Another fun trick.
Here I am just using a Diffuse.tga from one of the Tiny Weeds
Make a trans map for it like we did before. Create a 1m 1 section plane and apply all the textures to it including your trans map. We now have a type of scene asset called a billboard. You can place many of these in the distance as a means of populating your scene and not overloading memory or render time, because this is only one polygon.
They billboards usually don't look good up close because when they are close unless the angle is absolutely perpendicular to the camera the actual flatness will show and won't look right. In the distance this is much less of a problem.
Saving for reuse
The methods here are fine for a single scene and can be saved with the scene. Because Studio does not store actual data with your saved scene but paths to the files, this approach can be fragile. First, it won't move to another system. Second if you move or rename and directory in the path to these files, the scene will not reload completely.
You can place the model and textures into your Studio library, where it will be useful as long as you maintain the library. The new items will be preserved whenever you update or move Studio like the rest of your library items.
You may have noticed that Nobiax uses his directory structure to assure uniqueness. Absolutely every diffuse texture file is named diffuse or diffus, and so on for the others. I congratulate him. That is a very solid and professional approach. Since I am very unlikely to get a call from the
League_of_Extraordinary_Organizers
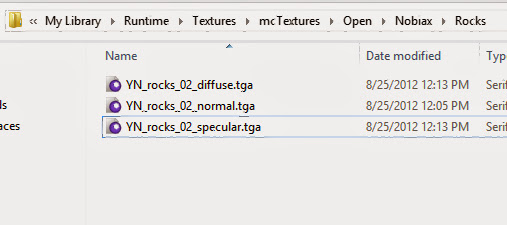
Inside your library file you will find a Runtime folder and inside it you will find a Textures folder. In the textures folder you will find many, many folders from the various sources you have used.
For items we add ourselves we should make a folder here that identifies our stuff. I call mine mcTextures. Inside that folder I like to be clear what my usage rights are, so I include 3 folders Private (for textures I can not reuse), Open (for open source, etc. ) and Product (for textures I make myself). So for our example, inside Open I have a Nobiax folder and inside the Nobiax folder I have Rocks, Plants, and Stuff folders.
Now we have to do something about the file names. You could replicate his directories, but remember Studio preloads all of the library directories when you start up and it will only load so many. So I am going to try to make prefixes that will do the same thing.
Start with YN (for Yughuges aka Nobiax) then the group directory name, then the item directory name, the file name. so for this rock we have:
YN_rocks_02_diffuse.tga
YN_rocks_02_normal.tga
YN_rocks_02_specular.tga
If we had to make a trans map it would be:
YN_rocks_02_Trans.jpg
We don't have this for this example, though.
While I am there I rename the obj file to YN_rocks_02_rock02.obj
This file is not stored in this location -- wait for it, wait for it.
Close Studio and start again for a clean beginning.
First we import the obj from where it was, but with its new name
Apply the textures Like we did before, but get them from the new directories we made in the Studio library. Make a quick small render to be sure everything is OK.
Return to the My Library directory and open the folder name Props
Make a new folder inside Props based on your name. Mine is mcProps. Again you need the Private, Open, and Products folders. If you are going to have a number of Nobiax items you should repeat the folders we put in Textures. In this case Nobiax containing
Plants, Rocks, and Stuff
You could, of course, have a much simpler structure in you are not going to add many things to your library. I prefer a clear layout that is easier to remember, but the only requirement beyond the system set names like Runtime, Props, ... (which you should only open -- never move or rename or create another with a similar name.) ... is that the names are unique and don't collide. The names don't even have to match.
If you want a different name, like roundish Rock or whatever, take care of that now.
Work through the menus
File-Save As...-Support Asset-FigureProp Asset...
Type in the name you want for this prop no extensions.
Studio opens this dialog:
I entered Vendor Nobiax
Product Name Rocks
Item Name is filled in by the system
Check the Set Content Type check box and open the drop down list
Select Prop, but do not choose one of the subcategories.
Accept, then Accept again.
Almost done.
Close Studio and open again.
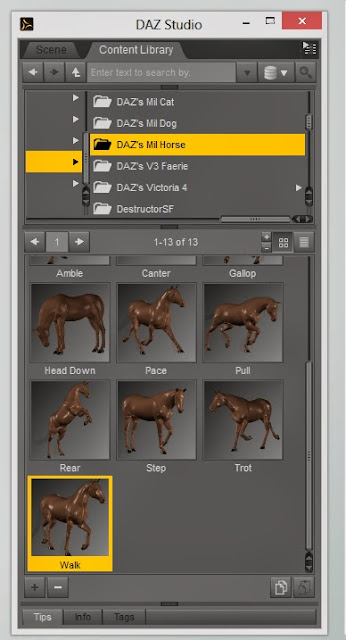
In the Content Library Tab navigate to the prop we installed
Double click on the icon, and there it goes into the scene like any other prop.
That is a lot of steps, I know, but I want to show the exact detail. This is a very powerful ability. Many assets are available as obj's, they usually come from large, expensive, and are typically, but not always, better quality than DAZ/Poser freebies.
Once you get through this the foundation is set and adding the next one is easier.
Unfortunately, this process does not guarantee that an obj will work in Studio. The problem I most often see is n-Gons (a polygon with more than 4 sides) 3DS Max, Maya, etc. support them, but Studio does not. So try an obj first, before cranking through all the steps.
Other problems are scaling, when the import item is tiny or giant. Fix this with the scaling factor on the import dialog. Another issue is stuff flopped on its side or seeming to stand on its head. In Studio, up is Y. On some other systems up is Z. There is a box on the import dialog to take care of this. Experiment to you get the item imported or know its not going to happen.
I would appreciate your feedback. Is this too much detail for you? Would you rather I make it shorter with more general descriptions or do you prefer step-by-step?
oOo
Galleries RuntimeDNA & DAZ 3D










3_5.jpg)


0 comments: