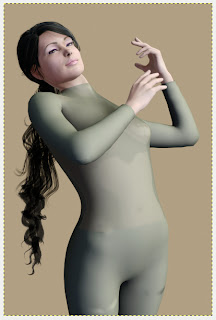
Mucha Pose 4
A Little Postwork
Postwork is working on the render file in a image editor like Photoshop or GIMP.
Starting with the render file
First, use Colors-Curves to generally brighten the image.
Mucha images usually feature fantastically long hair. Postwork is a great way to do it. There are brushes that are created just for drawing hair. The fall into two main types. One type uses carefully placed and colored dots that will produce a good looking hair strand when you stroke them. One nice set of these brushes are made by el-L-eN who has made them available on Deviant art at Brushes
The other type are actual images of hair strands that you size and place like other image brushes. I like the set called GIMP Wavy Hair Brushes, by Project-GimpBC also on deviant art at
Wavy Brushes
Create a new transparent layer. Zoom in on the peep hole by the neck.
Make your new layer the active layer and select the color selection tool. Turn off anti-aliasing and select transparent areas. Turn on Sample merged.
Only a portion of the peep hole will be selected. Its possible to get better coverage by increasing the tolerance, but this picked up a lot of unwanted strays, so I change the color selector to add mode and clicked on the missed areas until I had good coverage of the peep hole area. Change the foreground color to match a dominant hair color and set the background to match the peep hole. Change to the brush tool and choose one of the dot type hair brushes. Make it very small to work into the peep hole area. Draw arcs to look similar to the nearby hair until the peep hole is mostly filled.
Create a new transparent layer and make it active. Using a strand image brush add to the rendered hair. Be sure to change brush types and size often.
Because these hair extensions are on their own layer, it is possible to move the around a little and erase portions. Keep going until the hair matches the spirit of the original pose.


3_5.jpg)


0 comments: