Friday, June 28, 2013

Freebie Friday 7


The Black Chair


Most Digital Creations offers a freebie called The Black Chair.   It is a large black chair and a set of poses for  V4, V5, and Genesis. Here is a link:  The Black Chair


Adam Thwaites, the man behind this website has made a major contribution to the 3D Art community.  He releases a new free model about once a week and has done so for years.  The archive at his site is huge.  Usually the models are small single figures that are very well made, but he also makes poses and morphs.  He main emphasis is Poser, but many of his items, especially recently, also support DAZ Studio.

Here is Genesis in the various poses that accompany The Black Chair.


The chair is indeed very, very black which turns out to be a strength.  This helps to swallow
shadows and hide small posing issues well.  When you need to quickly make a contemporary setting render, this prop can be a big help.

The color is easily changed by changing the diffuse color in the surfaces tab.


In general the poses are an excellent starting point.  Fine tuning is mostly a matter of personal style and preference.  Here is my favorite with minor changes and an expression.


The chair is a single piece with limited detail (which also works with the black color)  Some scaling is possible, but the arms quickly grow large in relation to the total.  To me, this example is about as far as one can expect.


0 comments:

Friday, June 14, 2013

Freebie Friday 6


Introducing Antonia Polygon


Antonia Polygon is an open source figure developed with Internet collaboration a few years ago.

{ Alert : Antonia is not a Barbie doll.  Many of 3D's figures begin bald and neutered -- not Antonia.  Many of the links below might lead to full frontal nudity. ]

She has her own website where you can find the base figure, morphs, clothing, and jewelry.

You can also find many Antonia items on sharecg.com and there is an Antonia store at runtimeDNA


First, I recommend placing all Antonia items into its own library.  I put mine in

Users/Public/Pulbic Documents/Antonia_Polygon


Then make D/S aware of this library.  Click on the Content Library tab, then click the menu icon to the upper right in the docking panel and choose Content Directory Manager.  In that dialog add your library in the poser format group.


Formats for the zip files vary so examine the contents to choose the best way to unzip for your library.


The standard 1.2.x version works well in D/S I recommend avoiding the weight mapped (WM) figures, clothes, etc. because D/S generates many error messages and becomes sluggish if one is loaded.

Conforming and dynamic items often have disappointing results.  EnglishBob's Flo-hair at  Morphography is an excellent performer though and follows poses very well.


And now for the good news :  there are many alternate characters, skins and morphs for Antonia and they mostly work very well from a poser format library.
 

There are a substantial number of good poses including a great time saver -- hand poses.

Preset expressions and named expression sliders are weak or missing, but basic controls for brows, eyes and mouth are available and work well.


Not all of the clothes work well with all the poses, so hand adjustment is needed often.

Although no match for Genesis, Antonia is quite versatile.


0 comments:

Tuesday, June 11, 2013

Modeling Monday 5

Character Packaging


Sometimes a character is used over and over again, when making a graphic novel or animation for instance.  The character needs to be reused in a number of different scenes.

DAZ Studio has a number of related Save as...  Presets. But none do exactly, what is required.

There is a character preset that saves the character and some of the pose, but loses hair, clothing, expression, parts of some poses.

There is a wearables preset that saves hair and clothes.

There is a pose preset that saves all of a pose including expression, but sometimes loses location, so that the character jumps to another place when the pose preset is applied.

All of these are stored together in separate places.  When you have half a dozen or more characters in a story, it can be hard to keep track.

Also these presets leave their related objects around when they are removed from a scene. Removing a wearables leaves a bald naked character behind.  Removing a character leaves floating clothes.

Here is a low overhead.  I mean little or no impact on rendering time and a very small impact on file size.

By using grouping we can organize a character nicely.


In this example I am showing a character named Joan2.  She has hair and clothing.  There are also a couple of very useful null objects.  The first is the Target.  When you want to point something at an object that something points at the center of the object.  For most characters this "center" is not at the geometrical center, but between the feet on the floor.  This is actually a very good choice and is useful for many purposes, but its not so good for aiming lights.  I have seen light sets that aim the lights about 1.5 meters above an object's center to try to light the head.  This can lead to different "light sets" for standing, sitting, or reclining poses...  Of course, these sets are doing you a small favor - you don't have to understand where the center of your object is or add to your character as I am suggesting.  When a character has a target that can be position on or near the character depending on needs, using point at becomes more useful -- for lights, for aligning characters, and so on.

The lighting can point at the characters head for good illumination of expression or talking.  It can broadly point at the middle to light the whole figure making pose and action more clear.  Just moving the Target makes this possible. To also facilitates individual lighting of characters in a scene. I like to include the character's name when I can, so its easier to use than Target(2), Target(3),...

When we followed the Fiery Genesis YouTube tutorial we learned how to point the eyes at a camera.  After doing this a number of times, and even creating false cameras to aim the eyes.  I got a better idea -- add a null object LookAt for each character.  This allows setting each look independent of camera.  When you need for a character or characters to look at a specific camera, just parent the LookAt's to the camera and you have the same thing.  With independent LookAt's the eyes can follow the camera for part of an animation and look away easily.


In this example I show having alternate outfits under clothing. Extreme alternates here.  Here is our Joan in another outfit.  With this grouping you can switch outfits in two clicks


This packaging approach allows for storing and reusing a character design, so that you can have the sizes, shapes, coloring, clothing fits, handheld props, etc.  all worked out in advance.  You can make and many and as varied character design studies as your project will need and be ready to use the characters in scene after scene.


0 comments:

Friday, June 7, 2013

Freebie Friday 5

\
Art Nouveau Icon and some essential scripts


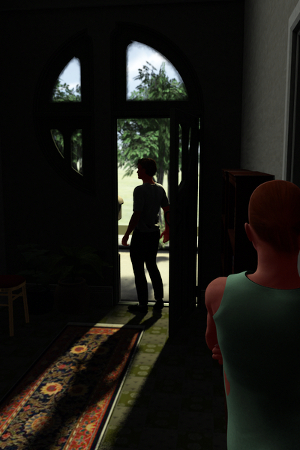
This door way has been an art nouveau icon for a long time.  I can remember photos from my childhood and its will show up on almost any art nouveau web search, guaranteed for art nouveau door.  What a thrill it was when it turned up as this month's freebie for Platinum Club Members at DAZ 3D. It includes a very good interior as well.  For non-members its $7.00, so give some serious thought to joining up as a PC member.


There are so many outstanding  props, clothes, and hair for $1.99 for PC members that it has been a bargain for me.


This model is by Jack Tomalin, one of the great masters, who generously prices many items for PC members at $1.99.  His models are the apogee of quality and versatility.

Although, I've only had this prop a couple of days.  I have been inspired to make several renders

<<  covers 1 -3  >>
'


Since this item isn't exactly free for everyone, let's look at a few items that are.  Scripts and coding add ons that allow programs to add new features, or package existing features in a more easy to use way.  Here are three that I find essential.

AMR's  render settings.  There are a few freebies and pay products that package render settings in set of single buttons.  This script has a very useful range, that has severed me well.  Render settings was one of the first things I learned and adjusting settings to fit current needs can take a while.  Often, I would forget one and not get the speed or quality I wanted.  This script has excellent choices and is very well organized.  Quick easy render settings and many fewer mistakes.

 AMR's script is available at    Render Settings Script

Quality levels


Also includes a range of sizes and additional settings, that are not as useful for me, but might be a gold mine for others.


The screen shot above also shows a method to add script items to a menu. Right clicking on a scripts icon will bring up a menu.  The choice Create Custom Action  will add the selected script to the Scripts menu at the top of the DAZ Studio screen.


m Casual Jacques

mjCasual (screen name) has donated many scripts to the 3D Art community.  Here are a couple that I especially like.

Deluxe look at camera

download and manual :
https://sites.google.com/site/mcasualsdazscripts2/mcjlookatthecamera

Introduction
This script for Daz Studio will take care of posing the head, and optionally, the neck, chest, abdomen and hip, so that the face faces the current camera.
This script was suggested by Daz Forums member Tugpsx

Use
Select a figures head.
launch the script
it looks like this


select the play range to be processed.
Select the bones (other than the head ) that participate in the twisting of the body required to bring the face to face the camera.
click on the Do it button

The results are remarkable in animations, but also quite useful in still posing as well.

Jump to another location

The direct link to this page didn't work, so the best way to get this one is to use this link to m Casual Jacques home page and scroll down until you see mcjJump

mcj Home

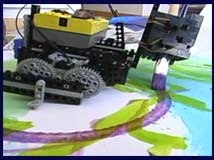
This script is very handy for moving a object to the location of another.


Select two items in the scene tab and then double click on the mcjJump script (or menu it has been added to the script menu )  There will be a dialog with the two items. Choose one, the other item will be the one moved.


0 comments:

Thursday, June 6, 2013

Mucha Pose 4


A Little Postwork

Postwork is working on the render file in a image editor like Photoshop or GIMP.

Starting with the render file


First, use Colors-Curves to generally brighten the image.


Mucha images usually feature fantastically long hair.  Postwork is a great way to do it.  There are brushes that are created just for drawing hair.  The fall into two main types.  One type uses carefully placed and colored dots that will produce a good looking hair strand when you stroke them.  One nice set of these brushes are made by el-L-eN  who has made them available on Deviant art at Brushes


The other type are actual images of hair strands that you size and place like other image brushes.  I like the set called GIMP Wavy Hair Brushes, by Project-GimpBC also on deviant art at
Wavy Brushes


Create a new transparent layer.  Zoom in on the peep hole by the neck.


Make your new layer the active layer and select the color selection tool.  Turn off anti-aliasing and select transparent areas.  Turn on Sample merged.


Only a portion of the peep hole will be selected. Its possible to get better coverage by increasing the tolerance, but this picked up a lot of unwanted strays, so I change the color selector to add mode and clicked on the missed areas until I had good coverage of the peep hole area.  Change the foreground color to match a dominant hair color and set the background to match the peep hole.  Change to the brush tool and choose one of the dot type hair brushes.  Make it very small to work into the peep hole area.  Draw arcs to look similar to the nearby hair until the peep hole is mostly filled.


Create a new transparent layer and make it active.  Using a strand image brush add to the rendered hair.  Be sure to change brush types and size often.


Because these hair extensions are on their own layer, it is possible to move the around a little and erase portions.  Keep going until the hair matches the spirit of the original pose.


0 comments: