Modeling Monday 7
Building a Wall
A Walk Through Surfaces, Materials, and Textures.
Let's make some walls we can use as a backdrops.
Basic colors
Let's start with a distant light.
Create -> New Distant Light choose default settings then X rotation -15 and Y rotation of 45, so we can get a quick visual feedback of what is happening.
First we need a plane Create -> New Primitive -> plane
Make it 6 m with one division. 6 meters makes it a little larger than a room size wall and one division allows a very small polygon count. X rotation of 90 and move it back Z translate -200. I like to rename it to wall.
Use the Front View camera, so we can see the wall straight on.
Open the surfaces tab and take a look at the default new wall. It is colored white, but a render comes out gray. So how do we get a white wall?
One way is to change the specular color from mid gray to white and reduce Glossiness to zero. This gives us a pure white wall, but loses the ability to show a shiny or matte surface. Another way is to change the ambient color to white and increase the ambient strength to 50%. This works and has fewer problems than the other approach. One limit is to be sure not to get objects very close to this wall because those objects will pick up some of the ambience from the wall.
How do we want to store this so we can use it again and again?
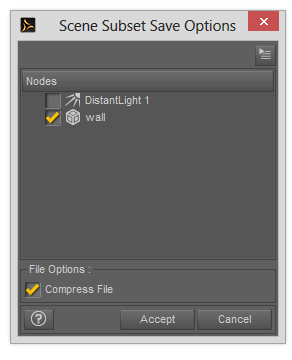
First save it as a scene subset but in a different directory. Navigate to your DAZ3D My Library -> Props directory. There make a new directory for your Props ( I use mcProps) Open that directory and create a new directory for this prop generalWall. Then open that directory and create a new directory colors, but do not open that one. Save our scene subset as gneralWall. In the options dialog uncheck the light so you are saving just the wall.
Now we need to save the material. In the surfaces tab and be sure wall and default are both selected. In the scene tab wall should be selected. Then File ->Save As -> Material(s) Preset... Navigate all the way inside the colors directory we just made.
Now let's make a matte white wall. Reduce the specular strength to 10% with glossiness at 100%. Change ambient color back to black and reduce ambient strength to 0%
Now save this as material preset in our colors folder and name it matteWhite.
For a black what that is a sink hole for all lights and shadows on it change the diffuse color to black and the diffuse strength to 0%. Specular color should be black and specular strength should be 0%. Make sure reflection and refraction strengths and also 0%.
Now save this as a materials preset into our colors directory and name it deepBlack.
For a shiny black move diffuse strength to 100% specular color to mid gray and specular strength 50%. and the Glossiness to 10% Leave the ambient dark.
Save this as a shinyBlack material preset.
<< s002 >> <>


Now we have a simple wall that changes colors just like a prop product.
Add colors you use often using similar setting for bright, shiny and matte. Save them here as materials presets.
Pictures.
Pictures on a plane make better backdrops than the backdrop feature because you can control the aspect ratio, brightness, perspective tilt, etc. Also these pictures on a plane have uses beyond backdrops -- for instance, place them outside a window of on interior image to provide an environment without building the whole scene.
Instead of creating a new plane load our general wall. In the surfaces tab click on the down pointing triangle on the left side of diffuse color choose browse from the menu that pops up and browse to your picture.

Scale, and position your picture the way you expect to use it.You can also adjust diffuse strength, color, etc. Save this as a scene subset into a new directory inside our generalWall directory called pictures.

Because you saved them as scene subsets the aspect ratio and other settings are preserved. If you just saved it as material preset these would be lost and your picture would be stretched to fit the existing wall. This also loads a new plane rather than recoloring your existing plane.
Pictures without strong shadows or distinct ground planes are generally more useful. If you do have shadows in the picture you should arrange your scene lighting to match shadow direction for best results.
Textured Wall
Pictures of wall surfaces can work better for you than just a picture backdrop by using other texture features of the surfaces tab.
We need a different base plane than the general wall.
Create -> New Primitive-> plane 6 meters again, but this time chose 80 divisions.
Some of the texturing features get results by altering geometry. Without divisions, there won't be anything to alter. This is slightly slower to render, but not by much. X Rotate 90 and Z translate -200. Choose a picture of a wall. Switch to respective view and push the wall back until you can see the whole thing.
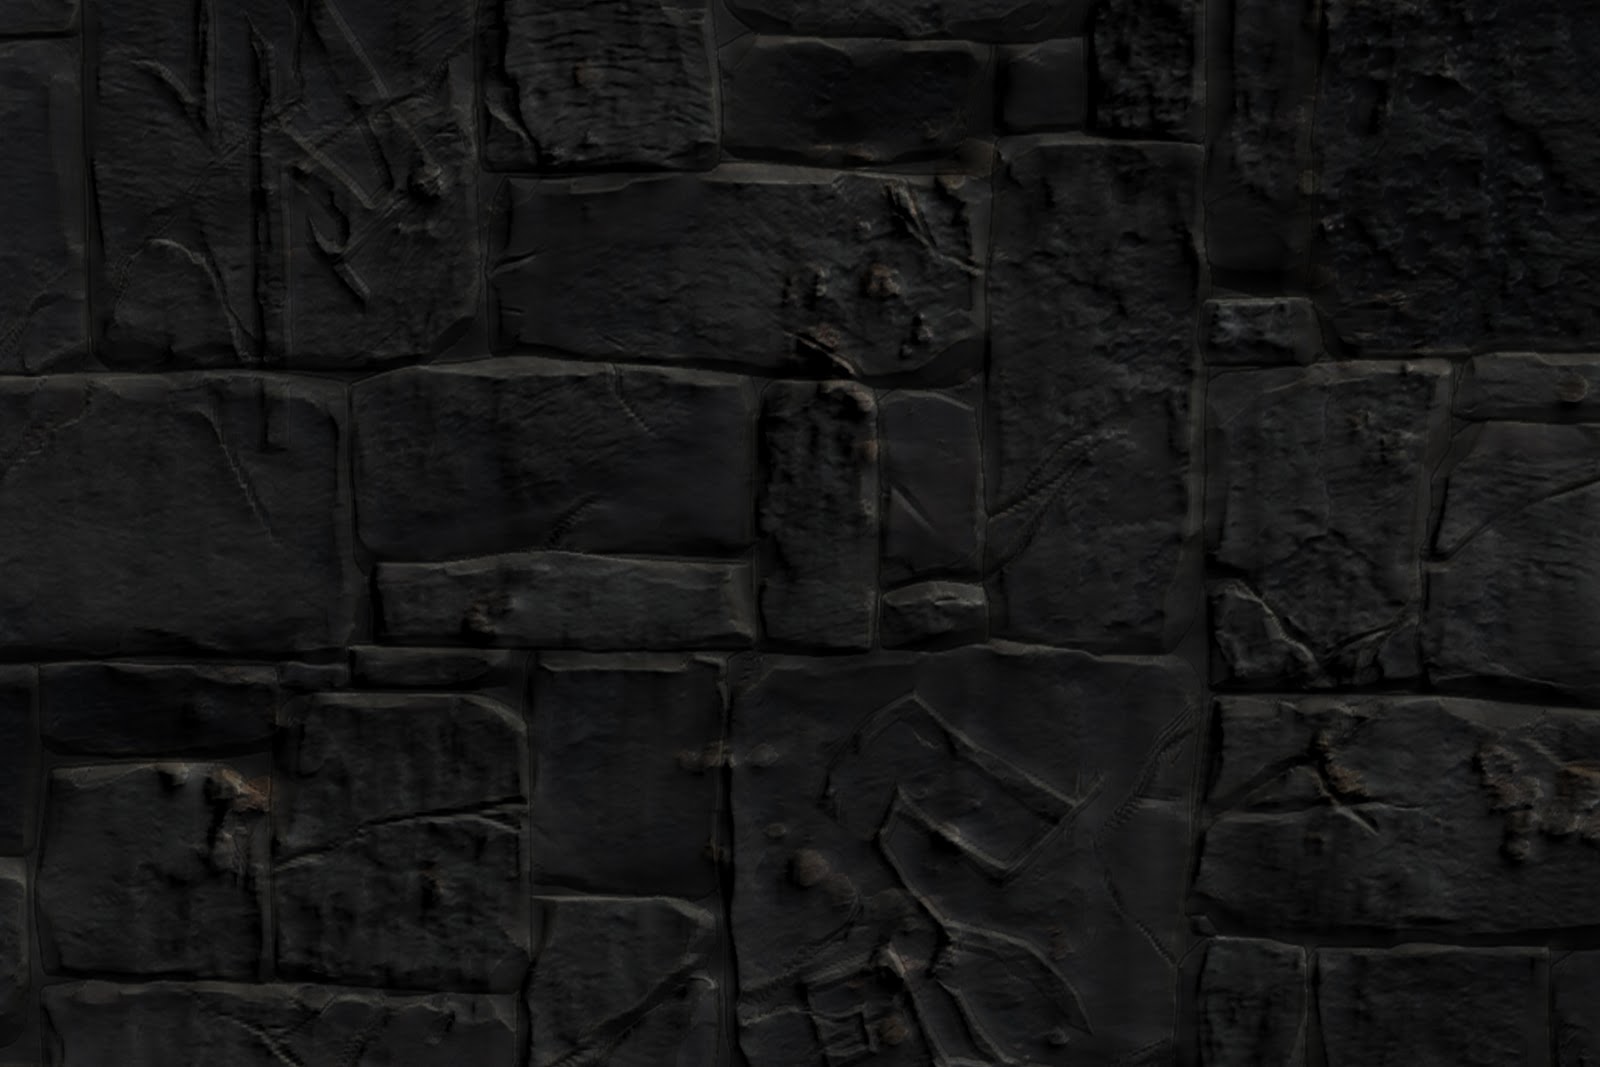
Here is a stone wall just a picture without texturing features.

Here is the same picture with texture features.
Using photoshop or Gimp, make a desaturated black and white copy of your picture. Be sure it is exactly the same size and
position.
Use this b/w picture for bump and displacement strength. Set the strength between 20 and 50% and the sizes -0.2 and 0.2. Make a copy of the b/w image and increase the contrast. Use this contrasty picture for specular strength.
Since this wall is different we need to save it into a new directory under our props texturedWall


3_5.jpg)


0 comments: