Friday, August 30, 2013

Freebie Friday 8


Partial Poses


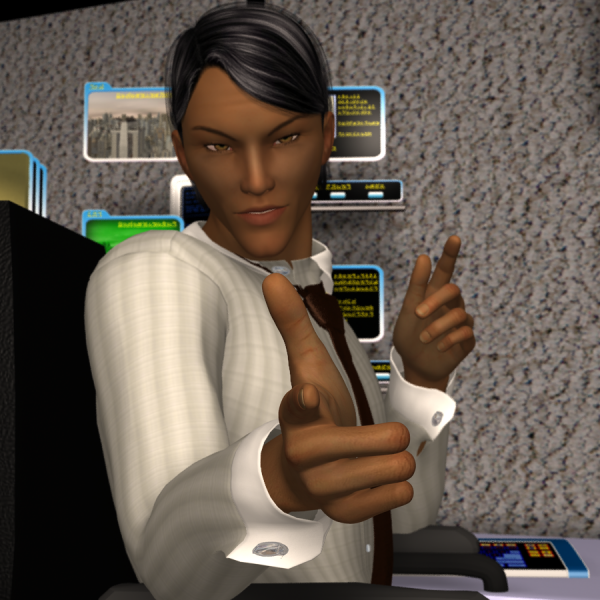
Kastastrophe has made a series of nice Genesis partial poses available for free through share cg (links below )

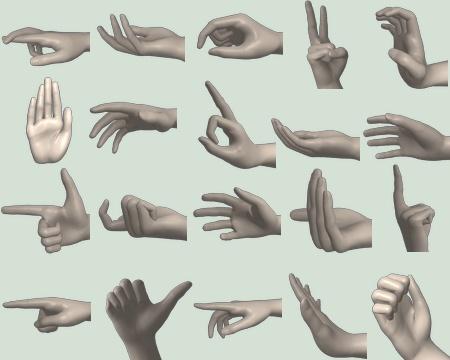
There are three sets one for legs, one for arms and one for hands.  The poses are an eclectic mix of everyday poses, utility poses and gestures.

The body poses are called Body Talk and are available at


Body-Talk-for-Genesis-Legs


Included are poses for both legs and one leg.


Body-Talk-for-Genesis-Arms


These, too, are for both arms or one arm and are usually mirrored


Hand-Jive-for-Genesis

The hands package is called Hand Jive and is predominately gestures.

<<119551 .png="">> <<119552 .jpg="">>


Because they are partial poses they have many uses combined with each other or as revisions to other poses. This set is excellent quality, but a little smaller (fewer items) than many partial pose packages for pay.

Also because they are partial poses, extra care is needed to keep your character upright and centered since these poses have no role in the central position of your character.

Here I started from the default "T" or zero poses and added hand and leg poses.  You can see the character a little bit twisted.


Instead of fixing it I applied two more partial poses.


Notice that, although the chosen partials are excellent for their described pose, the off axis of the character as a whole has gotten a little worse, but is still OK.

Now apply two more partials.


And now the balance situation has gotten too far off to ignore.  Frankly, a minor correction after applying each pose would have kept the whole sequence in good shape.  I didn't do that so I could demonstrate a caveat of using partial poses.  These partials are not worse than others ones available, even expensive partials have this issue.  Frankly, most poses need a little tweaking to fit your use, its just visible sooner when you use partials.

Partials are always a tool for extended your poses library and the gestures in these packages have very good story telling usage.

Read More

Monday, August 19, 2013

Modeling Monday 7


Building a Wall

A Walk Through Surfaces, Materials, and Textures.


Let's make some walls we can use as a backdrops.


Basic colors


Let's start with a distant light.
 Create -> New Distant Light  choose default settings then X rotation -15 and Y rotation of 45, so we can get a quick visual feedback of what is happening.

First we need a plane   Create -> New Primitive -> plane

Make it 6 m  with one division.  6 meters makes it a little larger than a room size wall and one division allows a very small polygon count.  X rotation of 90 and move it back Z translate -200.  I like to rename it to wall.

Use the Front View camera, so we can see the wall straight on.

Open the surfaces tab and take a look at the default new wall.  It is colored white, but a render comes out gray.  So how do we get a white wall?

One way is to change the specular color from mid gray to white and reduce Glossiness to zero.  This gives us a pure white wall, but loses the ability to show a shiny or matte surface.  Another way is to change the ambient color to white and increase the ambient strength to 50%.  This works and has fewer problems than the other approach.  One limit is to be sure not to get objects very close to this wall because those objects will pick up some of the ambience from the wall.

How do we want to store this so we can use it again and again?

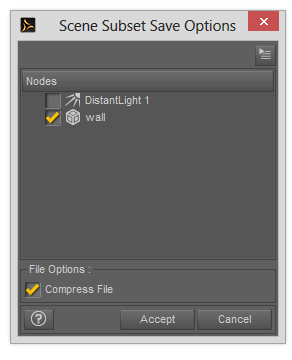
First save it as a scene subset but in a different directory. Navigate to your DAZ3D My Library -> Props directory.  There make a new directory for your Props ( I use mcProps)  Open that directory and create a new directory for this prop generalWall. Then open that directory and create a new directory colors, but do not open that one.  Save our scene subset as gneralWall.  In the options dialog uncheck the light so you are saving just the wall.


Now we need to save the material.  In the surfaces tab and be sure wall and default are both selected.  In the scene tab wall should be selected.  Then File ->Save As -> Material(s) Preset...  Navigate all the way inside the colors directory we just made.

Now let's make a matte white wall.  Reduce the specular strength to 10% with glossiness at 100%.  Change ambient color back to black and reduce ambient strength to 0%

Now save this as material preset in our colors folder and name it matteWhite.

For a black what that is a sink hole for all lights and shadows on it change the diffuse color to black and the diffuse strength to 0%.  Specular color should be black and specular strength should be 0%.  Make sure reflection and refraction strengths and also 0%.

Now save this as a materials preset into our colors directory and name it deepBlack.

For a shiny black move diffuse strength to 100% specular color to mid gray and specular strength 50%. and the Glossiness to 10%  Leave the ambient dark.

Save this as a shinyBlack material preset.

<< s002 >>   <>


Now we have a simple wall that changes colors just like a prop product.

Add colors you use often using similar setting for bright, shiny and matte.  Save them here as materials presets.

Pictures.


Pictures on a plane make better backdrops than the backdrop feature because you can control the aspect ratio, brightness, perspective tilt, etc.   Also these pictures on a plane have uses beyond backdrops -- for instance, place them outside a window of on interior image to provide an environment without building the whole scene.  

Instead of creating a new plane load our general wall. In the surfaces tab click on the down pointing triangle on the left side of diffuse color choose browse from the menu that pops up and browse to your picture.


Scale, and position your picture the way you expect to use it.You can also adjust diffuse strength, color, etc.   Save this as a scene subset into a new directory inside our generalWall directory  called pictures.


Because you saved them as scene subsets the aspect ratio and other settings are preserved.  If you just saved it as material preset these would be lost and your picture would be stretched to fit the existing wall.  This also loads a new plane rather than recoloring your existing plane.

Pictures without strong shadows or distinct ground planes are generally more useful.  If you do have shadows in the picture you should arrange your scene lighting to match shadow direction for best results.

Textured Wall

Pictures of wall surfaces can work better for you than just a picture backdrop by using other texture features of the surfaces tab.

We need a different base plane than the general wall.

Create -> New Primitive-> plane  6 meters again, but this time chose 80 divisions.

Some of the texturing features get results by altering geometry.  Without divisions, there won't be anything to alter.  This is slightly slower to render, but not by much.  X Rotate 90 and Z translate -200.  Choose a picture of a wall. Switch to respective view and push the wall back until you can see the whole thing.

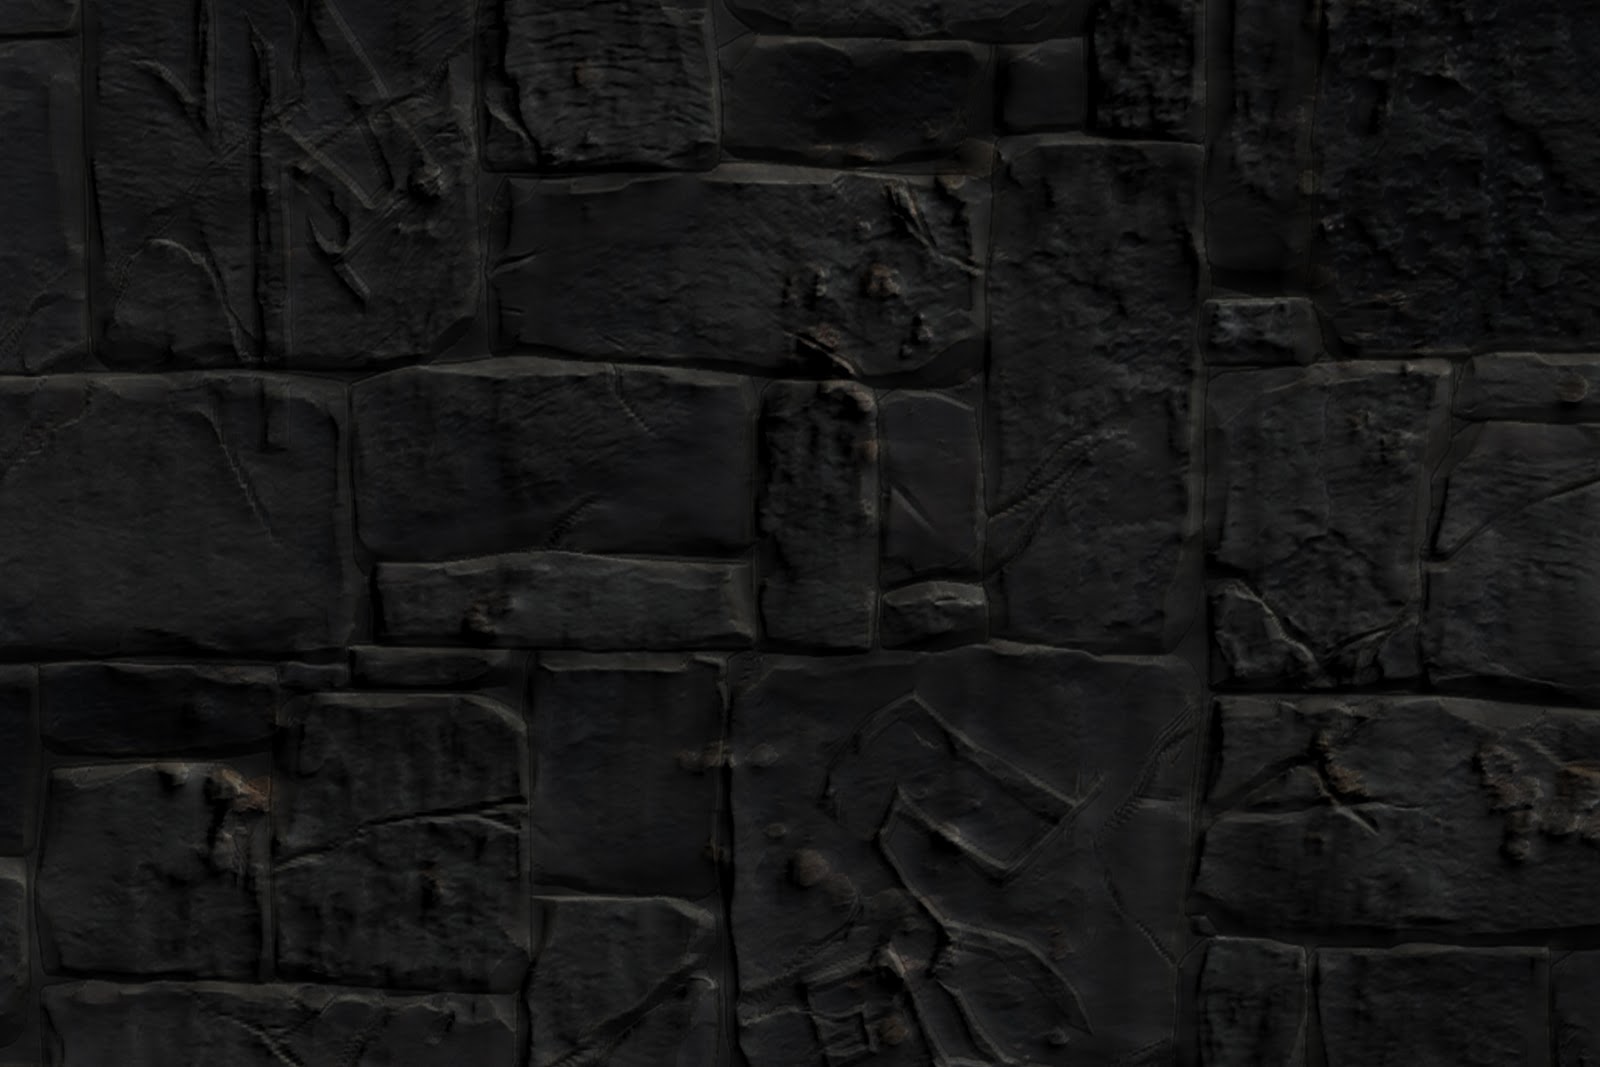
Here is a stone wall just a picture without texturing features.


Here is the same picture with texture features.


Using photoshop or Gimp, make a desaturated black and white copy of your picture.  Be sure it is exactly the same size and 
position.

Use this b/w picture for bump and displacement strength.  Set the strength between 20 and 50% and the sizes -0.2 and 0.2.  Make a copy of the b/w image and increase the contrast.  Use this contrasty picture for specular strength.

Since this wall is different we need to save it into a new directory under our props  texturedWall 


Read More

Monday, July 29, 2013

Recent Renders & New Directions


There have been a number of approaches and projects underway, but none of them is ready for posting here.  This little overview is done is the spirit of the journey, showing what's was started and what's holding it up.

Time of Day


Dawn

I am expanding the 2EZ lights(see index), to reflect the time of day for  outdoor scenes

Afternoon

The set here is La Piazza from Dreamlight.  This is a fantastic set and seeing this video about the set actually got me to start trying 3D Art


Although it is a budget buster this set is an exceptional value.  For those of us with limited machines, there is great news, too.  Because this set comes with a viable partial loading approach you can include as much stuff as your machine will handle and eliminate (better yet never load ) portions of the village that are outside your scene.

The 2EZ light approach uses only two lights, one of which is very static and one of which is carefully aimed for the current scene.  Now with time of day both lights are static and if they are to be accurate the scene has to have an unchangeable north/south orientation.  The camera must be moved around to find good opportunities.  I was deeply concerned that there wouldn't be enough light for a large scene.  The excellent lighting that comes with the set is composed of many, many lights.  But I think it is going to be fine.  I have a few times of day that are right and a few more that need more work.

Noon

Here you can see what I mean by some parts of time of day still need adjustment.  I am trying for and "experiential" time in which noon should feel like flooded with light and almost overwhelming lign.  This is working good on the buildings, but definitely not on the pavement.   

I love this set so much that I am planning a long project where I pretend to live in this town, for a while, make some art and have an exhibition  -- an artist's residency.  I have done actual artist residencies a number of times, so I have something to go on.  This project is a little bogged down because although this is a truly great set, it has a number of features that can make you crazy --  The mountains are on the same skydome and the sky so you can only rotate the sky in you don't care about consistency of the mountains. ( 90 % of the users of this set will think I'm a little crazy, but I have to change this before I move on.

Character Development


These characters were developed using the 2EZ studio and character grouping I introduced in Modeling Monday 5.  This needs some expansion too, especially in saving poses and expressions.  V6 is out now and the method of parenting clothing is different from V5 and Genesis.  Both are different that V4/M4 figures.  The methodology has worked for me in developing and documenting a cast of characters for a graphic novel and I think it work be useful for animations as well.  I need to refine it so I have a single method that works for 3 generations. Its already working for Gen4 and Gen5, so I am hopeful that Gen6 will fit it as well.

Headshot Studio


I am working on a headshot studio that is as packaged and versatile as the 2EZ Studio, but concentrates on head shots.  The lighting becomes much larger with multiple approaches that differ for male and female subjects.  This is the part of character development and scene development that takes the most time for me.  In my opinion, so much of what the character can communicate comes from pose (especially head and neck) and expression.

Expression Research


So much happens in the face - identity, emotion, attitude, mood, personality, and more  Its hard to find a way to improve our results.  The end is intuitive, when we think a connection is there, when the character feels alive, ...

Fortunately there are some avenues to expand knowledge and lead to better results.  In psychology, there is a concept of universal expressions and these universals are covered in the expression sliders available in DAZ Studio.  Again the three most active generations are different, but the mechanism is there and I am learning how to use it and planning to share what I learn.
Read More

Monday, July 1, 2013

Modeling Monday 6


GOBOs


A GOBO is something put in front of a light to create light patterns or shadows in the image.  The term comes from theatrical lighting where it stands for Go Between Optics.  The focusing high power stage lights put some limits on GOBOS that we can overcome in 3D Art.

The are made as simple geometric shapes in an image editing program such as GIMP, Photoshop, etc.  Even simple image programs can make GOBOs.

Here are some GOBOs for light patterns.


Create a plane with DAZ Studio's Create menu -> CreatePrimitive...


Name it in the scene tab to easily distinguish from other planes the scene. Then use the GOBO image in the Opacity Strength image (small down pointing arrow then browse to the GOBO image)  The black portion will become invisible and the white portion will block light.  Be sure your GOBO plane has cast shadows on.


Place this GOBO plane behind the camera (so its not visible in the scene ) and in front of a light.  Its possible to get a good idea where the light is going to be my looking through the lights view (in the camera drop out list)


It doesn't work with a distant light because the distant light is everywhere and doesn't have an effective position.


Substitute a spotlight for the distant light ( sun in the 2EZ light setup ).  This light is blocked by portion of the GOBO as expected plus it has the added advantage -- the spread angle controls the width of the light cone which allows keeping it from going around the GOBO.


The results in the image can only be seen correctly in a render, the preview is not entirely accurate for this effect. A good way to tune the effect is with shadow softness the image above is 25%

Once a good GOBO location is set up,  It is easy to try out the library of GOBOs, but just substituting different GOBO images in the Opacity Strength of the GOBO plane.


Lighting GOBOs are usually are exposed to high heat and extreme magnification,  so they are usually cut from sheets of metal, which limits what they can be.  3D scenes don't have these restrictions, so it is possible to use grayscale images for more effects that black and white.


These images can be prepared with contrast changes, etc.


Color is possible, too.  Because Opacity Strength is an absorption model colors are inverted.  To invert a color subtract each of its RGB values from 255.  So if this orange  200 200 0 is wanted use 55 55 255.  The resultant color will be close, but is strongly influence by light color and the color of the surface it strikes.


Read More

Friday, June 28, 2013

Freebie Friday 7


The Black Chair


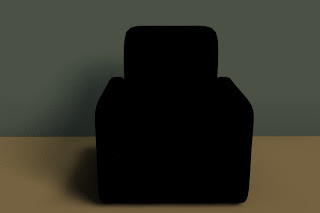
Most Digital Creations offers a freebie called The Black Chair.   It is a large black chair and a set of poses for  V4, V5, and Genesis. Here is a link:  The Black Chair


Adam Thwaites, the man behind this website has made a major contribution to the 3D Art community.  He releases a new free model about once a week and has done so for years.  The archive at his site is huge.  Usually the models are small single figures that are very well made, but he also makes poses and morphs.  He main emphasis is Poser, but many of his items, especially recently, also support DAZ Studio.

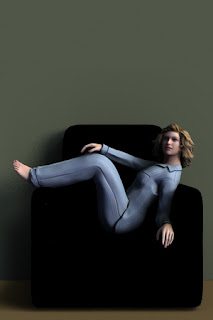
Here is Genesis in the various poses that accompany The Black Chair.


The chair is indeed very, very black which turns out to be a strength.  This helps to swallow
shadows and hide small posing issues well.  When you need to quickly make a contemporary setting render, this prop can be a big help.

The color is easily changed by changing the diffuse color in the surfaces tab.


In general the poses are an excellent starting point.  Fine tuning is mostly a matter of personal style and preference.  Here is my favorite with minor changes and an expression.


The chair is a single piece with limited detail (which also works with the black color)  Some scaling is possible, but the arms quickly grow large in relation to the total.  To me, this example is about as far as one can expect.


Read More