Introducing Antonia Polygon
Antonia Polygon is an open source figure developed with Internet collaboration a few years ago.
{ Alert : Antonia is not a Barbie doll. Many of 3D's figures begin bald and neutered -- not Antonia. Many of the links below might lead to full frontal nudity. ]
She has her own website where you can find the base figure, morphs, clothing, and jewelry.
You can also find many Antonia items on sharecg.com and there is an Antonia store at runtimeDNA
First, I recommend placing all Antonia items into its own library. I put mine in
Users/Public/Pulbic Documents/Antonia_Polygon
Then make D/S aware of this library. Click on the Content Library tab, then click the menu icon to the upper right in the docking panel and choose Content Directory Manager. In that dialog add your library in the poser format group.
Formats for the zip files vary so examine the contents to choose the best way to unzip for your library.
The standard 1.2.x version works well in D/S I recommend avoiding the weight mapped (WM) figures, clothes, etc. because D/S generates many error messages and becomes sluggish if one is loaded.
Conforming and dynamic items often have disappointing results. EnglishBob's Flo-hair at Morphography is an excellent performer though and follows poses very well.
And now for the good news : there are many alternate characters, skins and morphs for Antonia and they mostly work very well from a poser format library.
There are a substantial number of good poses including a great time saver -- hand poses.
Preset expressions and named expression sliders are weak or missing, but basic controls for brows, eyes and mouth are available and work well.
Not all of the clothes work well with all the poses, so hand adjustment is needed often.
Although no match for Genesis, Antonia is quite versatile.
Read More
Character Packaging
Sometimes a character is used over and over again, when making a graphic novel or animation for instance. The character needs to be reused in a number of different scenes.
DAZ Studio has a number of related Save as... Presets. But none do exactly, what is required.
There is a character preset that saves the character and some of the pose, but loses hair, clothing, expression, parts of some poses.
There is a wearables preset that saves hair and clothes.
There is a pose preset that saves all of a pose including expression, but sometimes loses location, so that the character jumps to another place when the pose preset is applied.
All of these are stored together in separate places. When you have half a dozen or more characters in a story, it can be hard to keep track.
Also these presets leave their related objects around when they are removed from a scene. Removing a wearables leaves a bald naked character behind. Removing a character leaves floating clothes.
Here is a low overhead. I mean little or no impact on rendering time and a very small impact on file size.
By using grouping we can organize a character nicely.
In this example I am showing a character named Joan2. She has hair and clothing. There are also a couple of very useful null objects. The first is the Target. When you want to point something at an object that something points at the center of the object. For most characters this "center" is not at the geometrical center, but between the feet on the floor. This is actually a very good choice and is useful for many purposes, but its not so good for aiming lights. I have seen light sets that aim the lights about 1.5 meters above an object's center to try to light the head. This can lead to different "light sets" for standing, sitting, or reclining poses... Of course, these sets are doing you a small favor - you don't have to understand where the center of your object is or add to your character as I am suggesting. When a character has a target that can be position on or near the character depending on needs, using point at becomes more useful -- for lights, for aligning characters, and so on.
The lighting can point at the characters head for good illumination of expression or talking. It can broadly point at the middle to light the whole figure making pose and action more clear. Just moving the Target makes this possible. To also facilitates individual lighting of characters in a scene. I like to include the character's name when I can, so its easier to use than Target(2), Target(3),...
When we followed the Fiery Genesis YouTube tutorial we learned how to point the eyes at a camera. After doing this a number of times, and even creating false cameras to aim the eyes. I got a better idea -- add a null object LookAt for each character. This allows setting each look independent of camera. When you need for a character or characters to look at a specific camera, just parent the LookAt's to the camera and you have the same thing. With independent LookAt's the eyes can follow the camera for part of an animation and look away easily.
In this example I show having alternate outfits under clothing. Extreme alternates here. Here is our Joan in another outfit. With this grouping you can switch outfits in two clicks
This packaging approach allows for storing and reusing a character design, so that you can have the sizes, shapes, coloring, clothing fits, handheld props, etc. all worked out in advance. You can make and many and as varied character design studies as your project will need and be ready to use the characters in scene after scene.
Read More
\
Art Nouveau Icon and some essential scripts
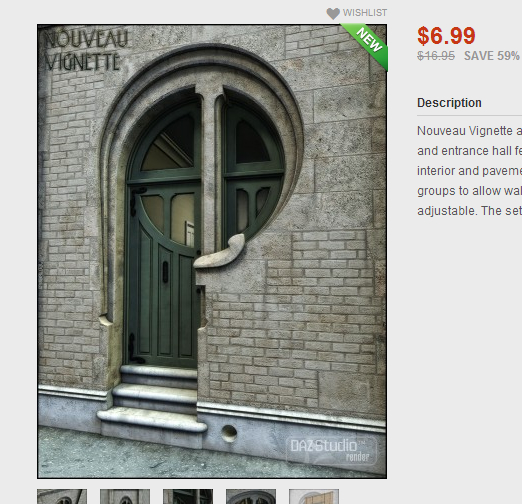
This door way has been an art nouveau icon for a long time. I can remember photos from my childhood and its will show up on almost any art nouveau web search, guaranteed for art nouveau door. What a thrill it was when it turned up as this month's freebie for Platinum Club Members at DAZ 3D. It includes a very good interior as well. For non-members its $7.00, so give some serious thought to joining up as a PC member.
There are so many outstanding props, clothes, and hair for $1.99 for PC members that it has been a bargain for me.
This model is by Jack Tomalin, one of the great masters, who generously prices many items for PC members at $1.99. His models are the apogee of quality and versatility.
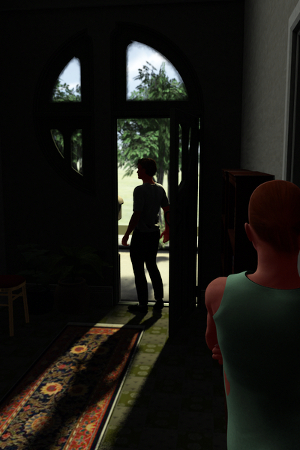
Although, I've only had this prop a couple of days. I have been inspired to make several renders
<< covers 1 -3 >>

'
Since this item isn't exactly free for everyone, let's look at a few items that are. Scripts and coding add ons that allow programs to add new features, or package existing features in a more easy to use way. Here are three that I find essential.
AMR's render settings. There are a few freebies and pay products that package render settings in set of single buttons. This script has a very useful range, that has severed me well. Render settings was one of the first things I learned and adjusting settings to fit current needs can take a while. Often, I would forget one and not get the speed or quality I wanted. This script has excellent choices and is very well organized. Quick easy render settings and many fewer mistakes.
AMR's script is available at Render Settings Script
Quality levels
Also includes a range of sizes and additional settings, that are not as useful for me, but might be a gold mine for others.
The screen shot above also shows a method to add script items to a menu. Right clicking on a scripts icon will bring up a menu. The choice Create Custom Action will add the selected script to the Scripts menu at the top of the DAZ Studio screen.
m Casual Jacques
mjCasual (screen name) has donated many scripts to the 3D Art community. Here are a couple that I especially like.
Deluxe look at camera
download and manual :
https://sites.google.com/site/mcasualsdazscripts2/mcjlookatthecamera
Introduction
This script for Daz Studio will take care of posing the head, and optionally, the neck, chest, abdomen and hip, so that the face faces the current camera.
This script was suggested by Daz Forums member Tugpsx
Use
Select a figures head.
launch the script
it looks like this
select the play range to be processed.
Select the bones (other than the head ) that participate in the twisting of the body required to bring the face to face the camera.
click on the Do it button
The results are remarkable in animations, but also quite useful in still posing as well.
Jump to another location
The direct link to this page didn't work, so the best way to get this one is to use this link to m Casual Jacques home page and scroll down until you see mcjJump
mcj Home
This script is very handy for moving a object to the location of another.
Select two items in the scene tab and then double click on the mcjJump script (or menu it has been added to the script menu ) There will be a dialog with the two items. Choose one, the other item will be the one moved.
Read More
3_5.jpg)
\
Another Pose
Action Tool from tools menu.
Here is a video tutorial on How to do the IK (called Action Tool in the Tools menu) which turns your cursor into a tool for moving the body parts.
First I loaded the 2EZStudio (made yesterday in Modeling Monday 4) from Scene Subsets
Then I loaded Victoria 5, and V5 Ponytail and chose a standing pose with arms raised from V5 poses. Y rotate to about the best orientation and pined the feet (like the video) and switched to the mid Thigh camera. Move the hip with your Action Tool cursor and then pin it. Next I positioned the head and pinned it. Now click on a hand and move it to about the nearest location like the Mucha original. Then the other hand. For me, this was faster than the previous approach. I could not move the fingers well with action tool though and wound up using the sliders in the parameters tab to pose the fingers. It took a long time. I really need to get some hand poses.
Next I worked on the expression. I prefer to get the pose close to done before working on the expression. So, I can be sure it works with the pose and camera.
There are two basic rules to remember.
1) Always brush your teeth twice a day.
2) Never, never use the zero expression.
:)
I tried quite a few clothing changes until I got some clothes that allow some transparency. I used Adam Thwaites Bodysuit. A Freebie at bodysuit
It fit the pose well, and changed color easily by changing the Diffuse color of the various sections of the body suit.
First I tried dropping the opacity of the sleeves, torso, and legs to 80%. I left the shorts at 100% because I don't want my blog to fall into the adult content world.
As you can see there are a number of spots that look about like holes in the body suit. These don't show in the preview, but are in the render. I tried the Mesh smoothing in the parameters with some success.
but not enough. This is more than I want to try to fix in post works. The curved surfaces will make post work fixes hard than just clone stamping.
I put the sleeves and legs back to 100% and got useable results.
A note about using the preset lighting -- the 2EZ lighting I set up before. This is certainly not the best possible lighting. At this point in my 3D Art Journey I am not looking to get great lighting. I want beginner's lighting -- a clear figure and environment, with some shadows for shaping. I'm sorry. I am just not up for trying out a lot of lighting now. I think that will slow me down from learning posing, colors, surfaces, shaders, and a number of other topics. I will try to improve the lights from time to time, but I now have a platform that let's me work on figures and faces and I can work on lighting later, when I have something I actually want to light well.
These images make clear that a lot of Mucha's charm comes from the extreme, fanciful detail. That level of detail and additional stuff for the image is far beyond my abilities and budget just now, but I think these images have benefited from study of the Mucha images and have a charm of their own.
Certainly 3D Art is capable of a finely detailed expressive face, that would be nearly impossible in a hand drawn lithograph.
Read More
More DM Freebies
The 3D artist team DM offers another excellent free model they call the Stair Wall
Available at
Stairwall
If we start with Fiery Genesis like we have before and then add the Stairwall, we can see chances for some good scenes right away


Lets add in another Stairwall and Y rotate 90 and align them so that we have a corner and the possibilities go way up.
This set is good for dramatic lighting as well.
When a piece is a high quality stand alone, often it is also an excellent high quality component of a larger construction.
Here I combined several Stairwalls with a Chapel (see Freebie Friday 3) to make a set as complex and rewarding as some expensive props.
Here is a list of the contents of my "Castle"
Because the pieces are so compelling the combination has many view points for your dramatic scenes or stories
By turning strategically placed elements the set can have many more rooms/scenes than a simple building alone.
<< r15 >> << r16 >>
Although this isn't technically a freebie, I want to alert you to an chance at a great bargain. Recently, at a Friends of the Library sale, I picked up a copy of Les Pardew's book about DAZ Studio for $2.00. It has a DVD containing V3/M3 A3/H3 A4/H4 V4.2/M4.2 and a few clothes and props. This is the first edition and although the text is solid it is somewhat out of date. There is a second edition which is a better book, but does not contain any models. So, if you shop for used books, you might just get very lucky.
Read More






3_5.jpg)

3_3.jpg)
3_4.jpg)
3_5.jpg)
3_6.jpg)


3_5.jpg)